¶ Features
¶ Persistent chat
uWebChat offers persistent chat on your website(s). This means that when website visitors start a chat and navigate to other pages on your website, the current chat session will remain. Once an agent has disconnected a chat using /dc or /disconnect, the chat session will be closed on the website visitor side. This allows website visitors to start up new chat conversation on your website.
¶ Save chat logs to OneDrive
uWebChat offers integration to Microsoft OneDrive to save the chat logs of an agent to their OneDrive. This requires a valid Microsoft 365 license to use OneDrive. A Global Administrator within your Microsoft 365 tenant must allow uWebChat to access OneDrive through the Microsoft Graph API.
To activate this feature, a conversation needs to be started with a uWebChat agent who is also a Global Administrator for the Microsoft 365 tenant. After ending a web chat conversation, the agent will get prompted to save their conversation to OneDrive. Accept this to continue.
uWebChat will then prompt for authorization. When clicking on the Authorize uWebChat button, the page below will be opened in a web browser. On this page, the tenant admin will be able to authorize uWebChat organization wide. This will make sure agents are able to use the save chat to OneDrive function.
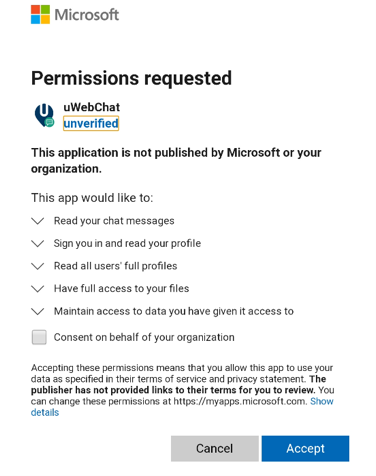
Once this has been done, every agent on your tenant is able to activate saving their chat logs to OneDrive.
After an agent ends their first chat session, uWebChat will ask if the agent would like to save chat logs to OneDrive. The agent’s choice will be remembered and not prompted for again after ending future chats.
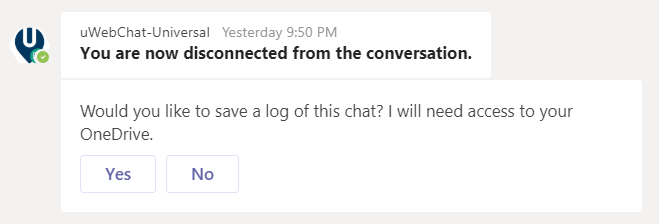
To use the save to OneDrive feature, agents will also need to approve uWebChat individually. This will permit uWebChat to use the Microsoft Graph API when trying to fetch the uWebChat chat history.
The following dialog is shown when a chat has finished:
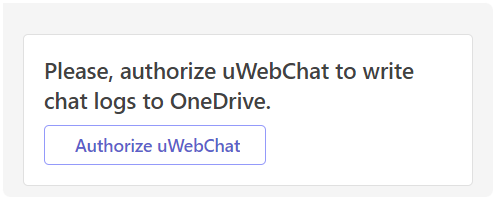
After clicking the Authorize uWebChat button, an agent will be redirected to a webpage within their web browser in which he/she needs to login to Office 365. When logged in, the agent needs to authorize uWebChat. After authorizing uWebChat, the agent will be redirected to a webpage in which a 6-digit code has been generated. The agent needs to copy this code and send it to uWebChat using the uWebChat chat window (within Teams). See example below:
After all steps have been completed, the uWebChat Bot will remember this setting and stores it for future use. The option can always be changed in the personal settings of the agent.
Note: uWebChat conversations are not stored outside your organization’s security context within Microsoft 365. Chatlogs stay within the users’ personal context.
The chat log files can be found in a subfolder under the user’s OneDrive named uWebChat Chat History.
The files are .txt files, viewable with almost any editor. The files themselves have the following naming convention: yyyy-mm-dd timestamp [agent email] – visitor name.txt

¶ Share chat logs with user
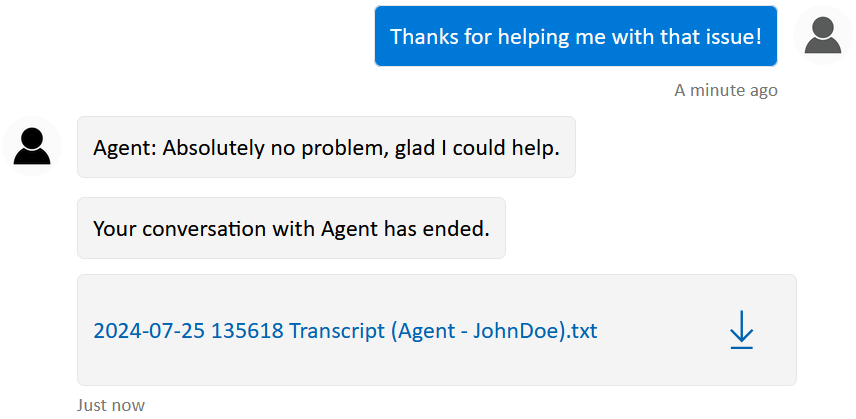
With the Basic, Professional and Enterprise license uWebChat will automatically generate a transcription based on the active conversation and share them with the chat user when said conversation has ended. This transcription will be identical to the one generated in Save chat logs to OneDrive, and is sent as a downloadable .txt file. Note that the agent's full name is omitted for privacy reasons, and only the first name is shared.
¶ Chatting via Speech-to-Text
With the uWebChat Professional and Enterprise license it is possible for chat users to communicate with Speech-to-Text. This means that chat users can talk (using speech) to uWebChat and the messages will be
sent to the agent. To use this feature, chat users can click the microphone icon (see below).

The browser the website chat user uses may ask for permissions to access the computer’s microphone. This needs to be allowed, before this feature works.
¶ Real Time Translation
The Enterprise edition of uWebChat has access to the real time translation feature. This feature allows agents and chat users to see messages in their preferred language. This feature is enabled automatically when an Enterprise license has been registered.
To give your customers the option to contact you in multiple languages, simply setup multiple groups and assign a designated group language. See Real Time Translation for more information.
After assigning a group a language, you can also set the option if your website visitors will be prompted which language they would like to use, based on either their browser language or the set group language. See Visitor Language Prompt for more information.
Agents can set their preferred language. Once this has been set, all messages from website chat users will appear in the preferred language of the agent. See Agent personal settings for more information.
It is possible that an agent wants to disable real-time translation during a conversation. This might be because your agent is comfortable using multiple languages. During a chat with a website user, the agent can use the /translate command to either enable or disable real-time translation. The website user will not see the command in their chat. Changing this setting during a chat does not translate previously sent messages.
¶ Customize Look and Feel
It is possible for you to change the look and feel of uWebChat. There are two ways you can achieve this:
- Changing the embedded button on your website
- Changing colors for your chat window for a Group chat
¶ Changing the embedded uWebChat button on your website
When embedding uWebChat to your website (See Embed uWebChat on a website), you are able to change the look and feel of the button and it’s placement. This can be done through CSS. When you receive the code snippet for embedding uWebChat to your website, you can substitute your own style sheet (CSS file) to change the look and location of the button.
¶ Changing colors in Group Chat
You can change the colors of a group chat to match your organization’s style guidelines. This requires a Professional or Enterprise license. See Group styles on how to set this up.
¶ Leave a Message
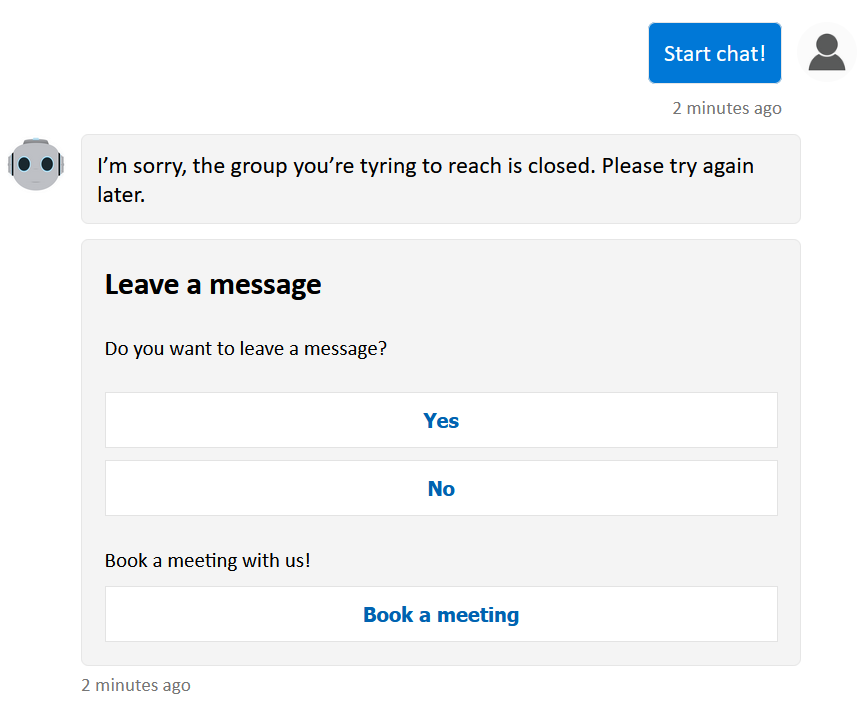
When a website visitor wants to contact you, but there are no agents available or you are outside of business hours, there is the option for the visitor to leave a message. These messages will be received by agents to read later. There's also a space available for a custom button that redirects to any given URL, e.g. for the booking of a meeting. See Leave a Message Prompt for more information.
¶ Meet Now - Teams Meetings
Starting from the Basic license, agents are able to start Microsoft Teams meetings with your website visitors during a chat. Your website visitors can chat with your agents either by using their existing Teams account or through their browser without an account.
During a chat, agents are able to start a meeting by using the /meetnow command. A rich card will appear for both the agent and the website visitor to invite them to a Teams meeting.
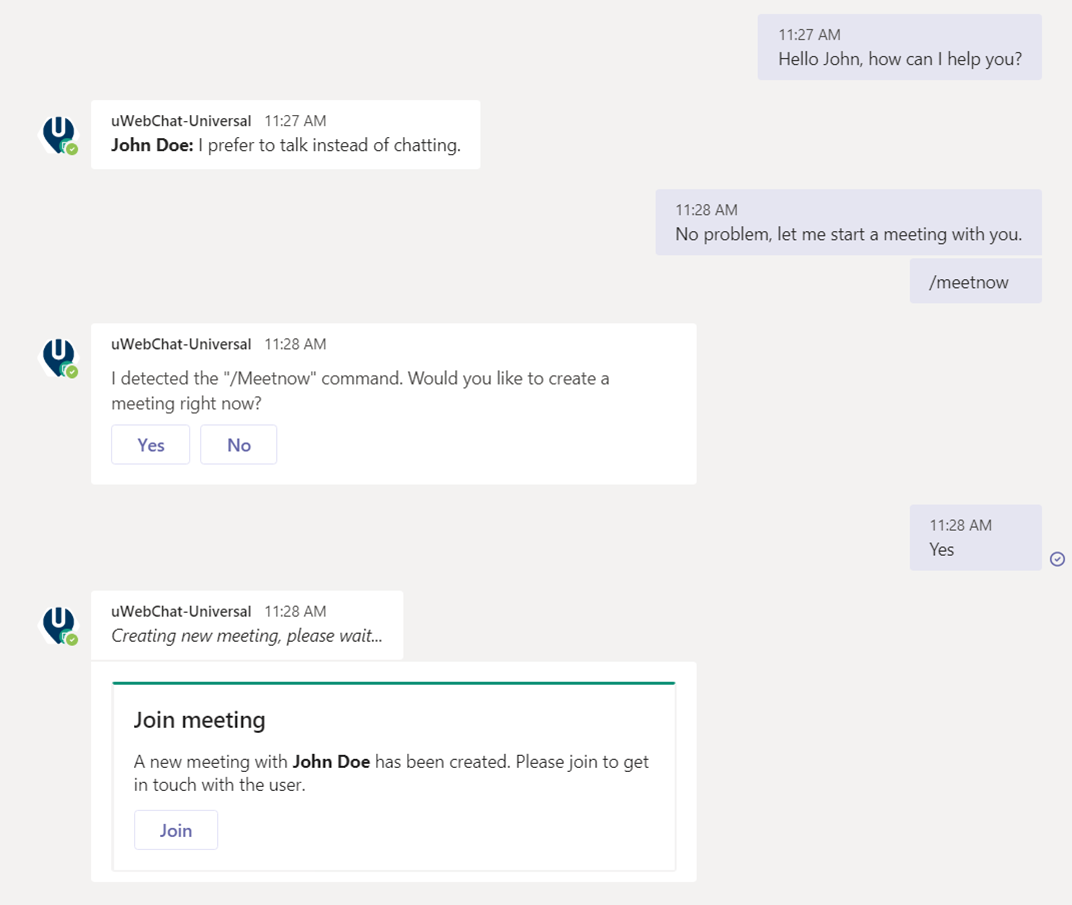
When the agent joins the meeting, the standard meeting workflow for Teams applies, see Microsoft documentation for more information.
¶ Authorize GRAPH API per Agent
When an agent starts a meeting using the /meetnow command for the first time they will be prompted to authorize uWebChat to make use of the MS Graph API. The Meet Now feature requires the ability to start a meeting from the Graph API.
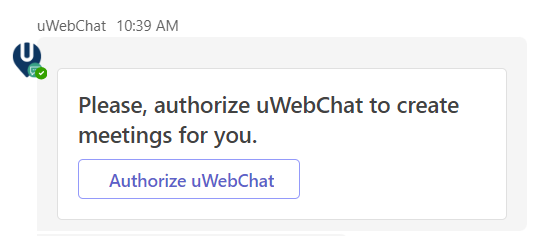
When an agent clicks the Authorize uWebChat button, a request is sent to authorize the agent to start meetings through uWebChat. If the agent has already logged in with their Microsoft account on their default browser, no further action is needed, and you will get a confirmation message that the authorization has been completed.
If the agent is not logged in to their Microsoft account when clicking the button, they will be brought to a page requiring them to login. After the login, a page appears displaying a numeric code. Simply enter the numeric code into uWebChat to complete the authorization.
¶ Ban uWebChat visitors
Starting from the Basic license, agents are able to ban uWebChat visitors. When agents receive unwanted chat requests from possible spammers, the /ban command can be used to temporarily block the IP address of the visitor.

After this command, the IP address of the visitor will temporarily be banned for all users within your uWebChat tenant. When banning an IP for the first time, it will be banned for 7 days. Subsequent bans are calculated on the amount times that specific IP has been banned.
The penalty is the future date calculated by the following formula:
- P = 7 + (number of times an IP has been banned * 7)
So, the second time an IP is banned, it will last 14 days, the third time 21 days and so forth.

¶ Idle conversation reminders
When ending a conversation with a website visitor, the agent is required to manually disconnect the conversation using /dc or /disconnect. When the agent does not disconnect from the conversation, they will be unavailable for future chat requests.
To remind agents to disconnect, the Idle Conversation Reminders feature was introduced. If a website visitor has not sent a message within 5 minutes, a reminder message will be sent to the agent:
No response received for 5 minutes – please disconnect if needed or keep the chat open
When the visitor replies, the 5-minute timer will be reset. If the visitor does not respond, the agent will receive the reminder every 5 minutes.

¶ Reporting
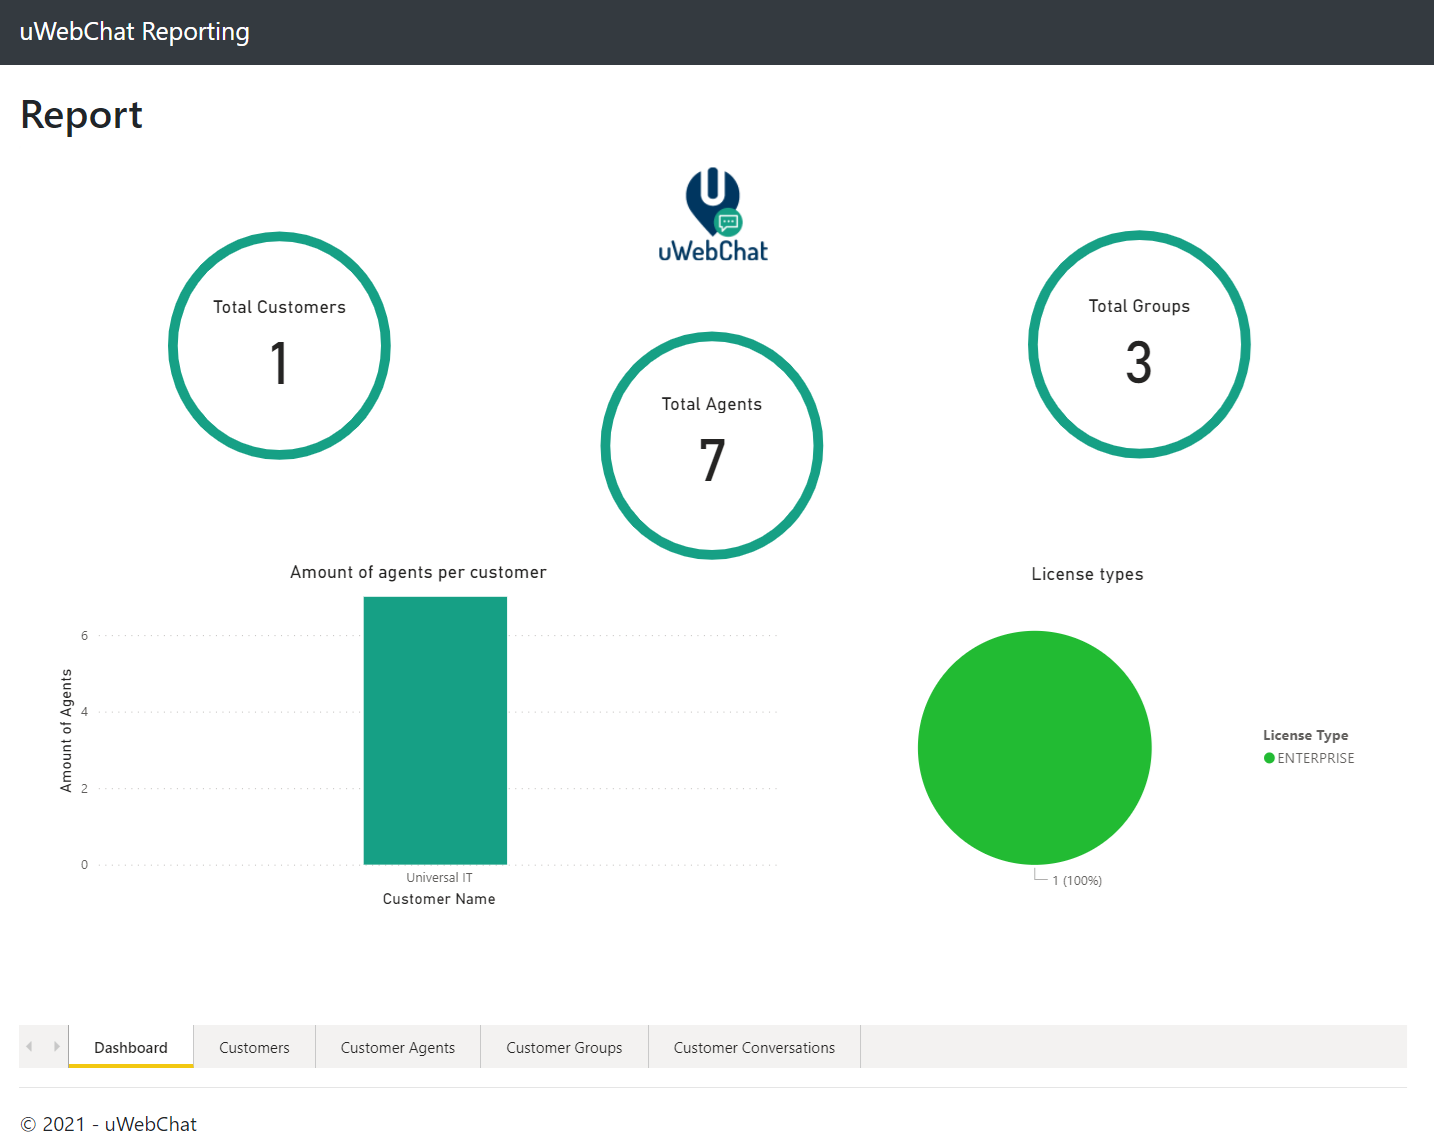
To get statistics about your uWebChat environment, such as the number of groups, agents and the number of conversations there were in the past, you can use uWebChat Reporting.
This can be accessed by going to https://report.uwebchat.com/. You can sign in with the same Microsoft account that is currently an uWebChat admin and you can view the required information. Sign in using the button Sign in with Microsoft.
After signing in, navigate the different tabs on the bottom of the page to lookup your preferred information.
¶ Enable additional fields
When embedding uWebChat to your website, your website visitors will have the option to start a chat by first entering their name. It is now possible to enable additional fields for your website visitors and even make them required.
We provide the following fields:
- Company
- Phone
- Country
You can enable these fields with the following steps. When you use the Embed command to generate code to embed to your website, you change the code to include the new fields.
For example, here is a code snippet of the embedding code without the custom fields:
<iframe allow="microphone" class="uwebchat-window-style" src="https://pool01.uwebchat.com/uwebchat.html?agent=11111111-AAAA-2222-BBBB-333333CCCCCC&customer=11111111-AAAA-2222-BBBB-333333CCCCCC"></iframe>
If you wish to add additional fields, change the following. The changes are marked as bold text in this example.
https://pool01.uwebchat.com/uwebchat.html?&fields=email,company,phone,country&agent=11111111-AAAA-2222-BBBB-333333CCCCCC&customer=11111111-AAAA-2222-BBBB-333333CCCCCC>
If you wish to make one or more of these fields required, add the &required= field.
<iframe allow="microphone" class="uwebchat-window-style" https://pool01.uwebchat.com/uwebchat.html?&fields=email,company,phone,country&required=email,company&agent=11111111-AAAA-2222-BBBB-333333CCCCCC&customer=11111111-AAAA-2222-BBBB-333333CCCCCC></iframe>
¶ Avatars
Microsoft 365 allows your users to set a profile picture (avatar) to their account. This picture will be visible in Microsoft 365 applications such as Microsoft Teams. You can enable uWebChat to use the same avatar for your agents. This allows your website visitors to see the avatars of the agent they are having a conversation with.
To enable this feature, the following steps need to be made:
- A uWebChat administrator that is also a Microsoft 365 administrator, needs to enable uWebChat to allow agents to use their Microsoft 365 avatar. You may be prompted by the Microsoft 365 Graph API to allow uWebChat to read the avatars from your users’ profiles.
- A uWebChat agent needs to enable the use of avatars in their uWebChat settings.
Example of avatar in action:
![]()
¶ Enable avatars as an administrator
We will start with the instructions on the actions to perform as an administrator.
Enter the help command in uWebChat to get an overview of options. Under Administrator Actions, select Manage Customer Settings. In the next prompt, select Avatar.
![]()
Select Yes in the dropdown field to enable agents to set their avatars. You may receive a prompt to authorize the use of the Microsoft 365 Graph API to retrieve your avatar settings.
¶ Enable avatar as an agent
Use the settings command or help > Open My Settings. Go to Avatar.
![]()
Set the value in the dropdown menu to Yes, to allow uWebChat to use your Microsoft 365 avatar.
![]()
You will be asked to authorize uWebChat to the Microsoft 365 Graph API, so that it can read your avatar.
![]()
A browser window will open. Login with your Microsoft 365 account to enable the authorization.
¶ Transfer conversations to another agents
During a conversation with your website visitor, there is a possibility that the agent that has started the chat is not the right individual to handle the question or request. uWebChat offers the transfer function to transfer a conversation to another agent within the same uWebChat group.
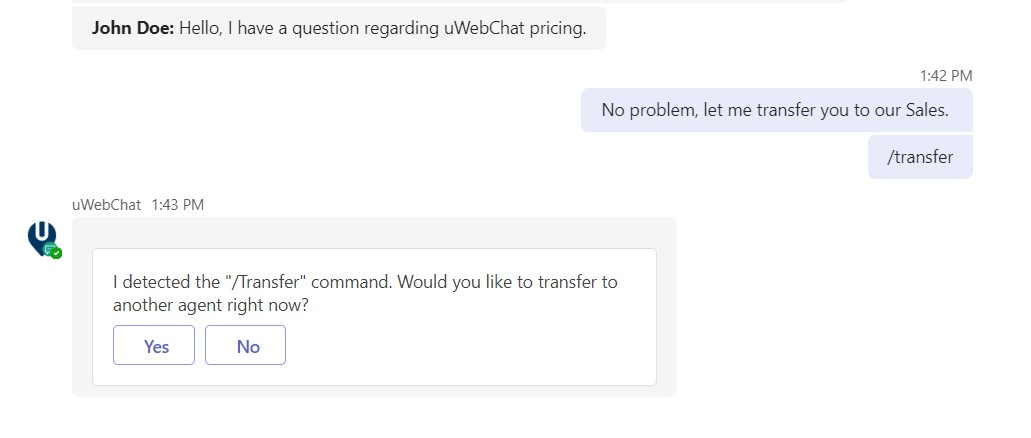
During a conversation, agents can use the /transfer command to start the process. They will receive a prompt to continue or cancel the transfer.
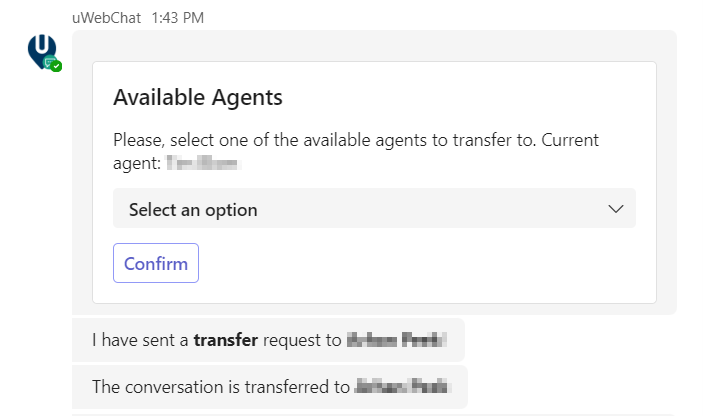
If the agent continues with the transfer, they will receive a prompt where they can select other agents in a dropdown menu.
The other agent will receive a request to accept the transfer.
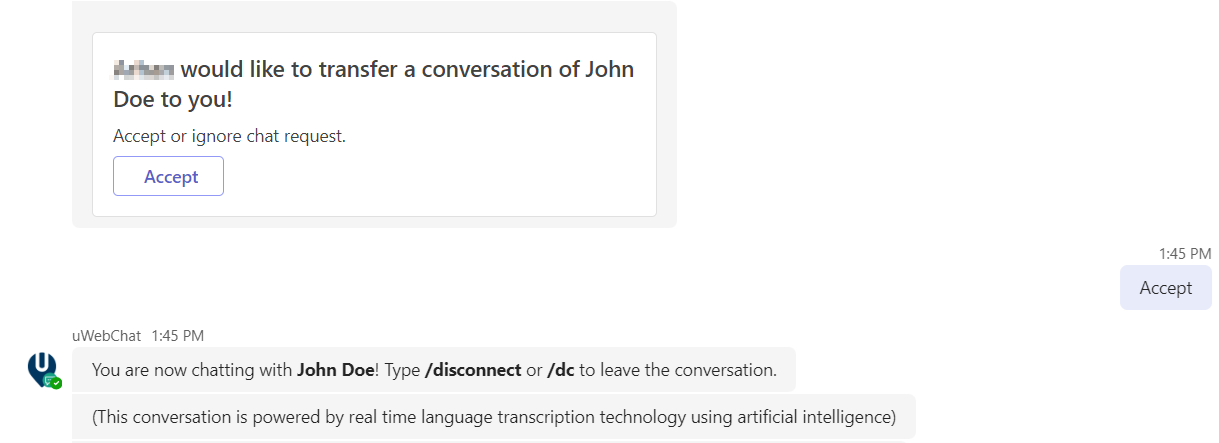
Finally, the original agent will receive a message that the transfer has been completed and disconnect from the original conversation.

¶ Media sharing
uWebChat offers the functionality to share media during an active conversation for customers with a Professional or Enterprise license.
¶ Sharing files as a visitor
The relevant button for this feature automatically becomes available within the chat for the visitor upon starting a conversation in the bottom left corner.

The visitor is then able to select any file of their choosing, and upload this to share with their connected agent.

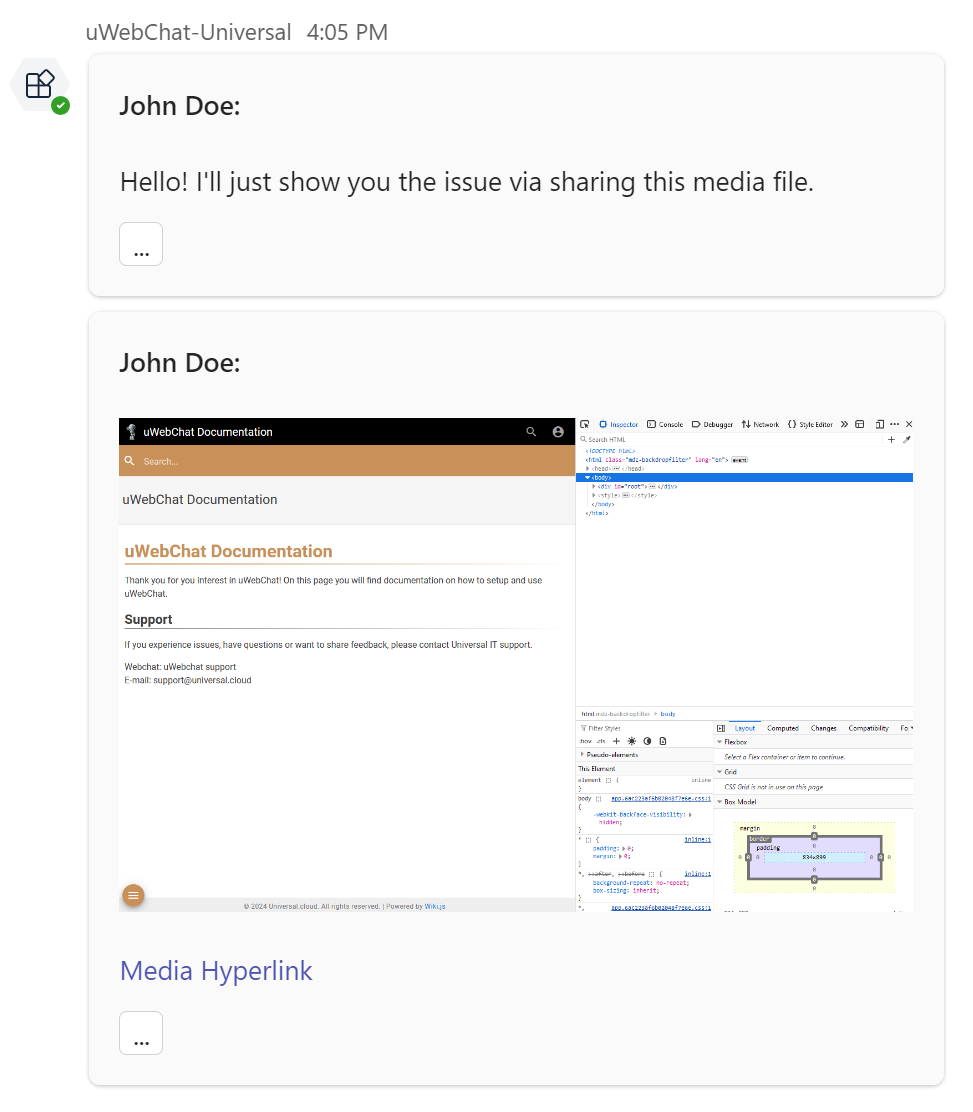
The shared media will then become visible within the agent's chat.
¶ Sharing files as an agent
Agents have the option of sending files via the built-in teams functionality, or by dragging files into their conversation directly. Documentation on how to share files within teams can be found here.
¶ Restrictions
Currently the only supported media types are:
image/jpeg, image/jpg, image/png, image/gif, image/webp, image/bmp, image/tiff.
Furthermore, the dimensions and file size are limited to what the Azure AI Content Safety API can handle. Currently at the time of writing this results in a file size of 4MB and dimensions of > 50x50 and < 7200x7200. See Azures Content Safety (Service Limits) for up-to-date restrictions.
Below an overview of the maximum shared files per conversation per license:
| License | Limit |
|---|---|
| Trial | 10 |
| Professional | 20 |
| Enterprise | 40 |
¶ Country Blocklist
uWebChat offers the option to block individuals residing in specified countries from starting a chat/conversation to customers who possess an Enterprise license.
The options to access this feature can be found under Help -> Administrator actions -> Customer actions -> Manage blocklist.
There are three commands available to manage the blocklist:
- Show me the blocklist - This displays a list of all the countries that are currently blocked.
- Add to the blocklist - This guides you through the process of adding countries to the blocklist.
- Remove from the blocklist - This guides you through the process of removing countries from the blocklist.
¶ Add to the blocklist
When selecting the option to add a country to the blocklist, the following dialog will prompt. Here you'll be able to select one or more countries to add, to confirm your selection, or to cancel out of the action altogether.
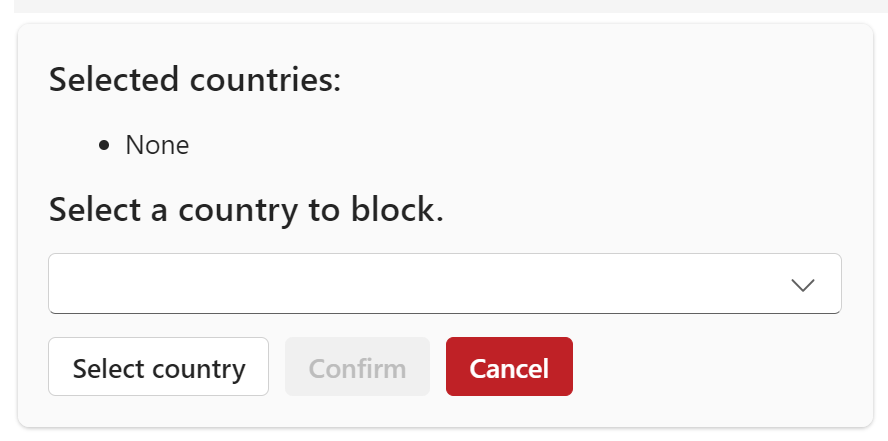
Upon selecting a country from the list (note that you have the option to type a partial name to speed up the selection), press the Select country button to add it to the selection.
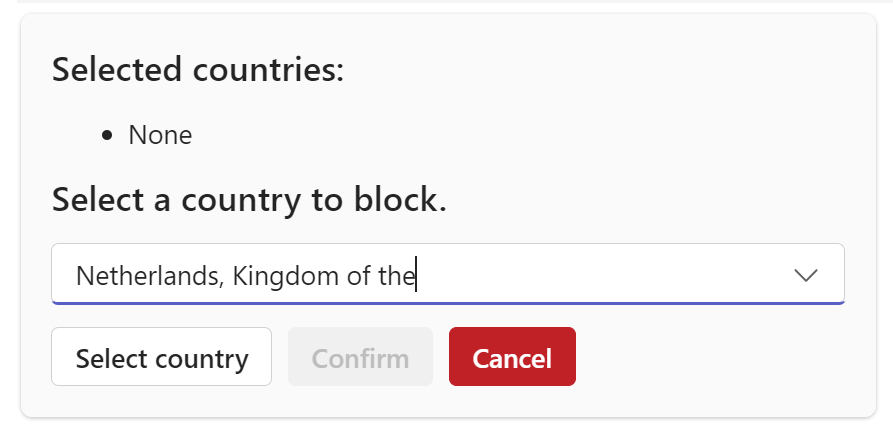
You'll then be able to add more countries to the pending selection.
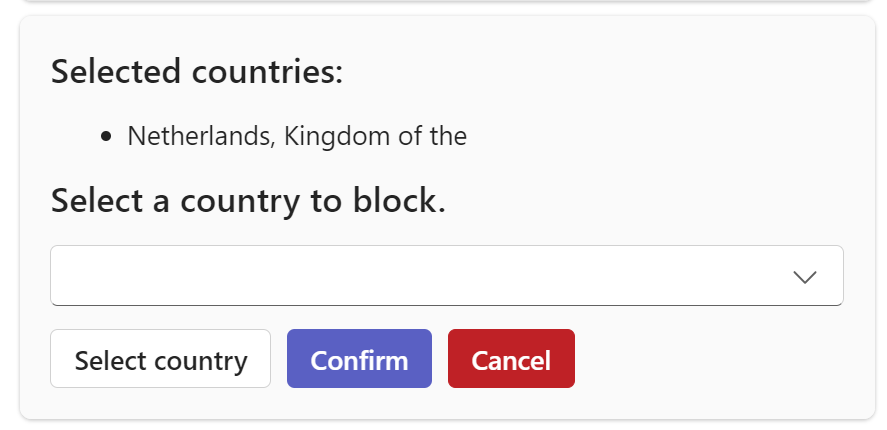
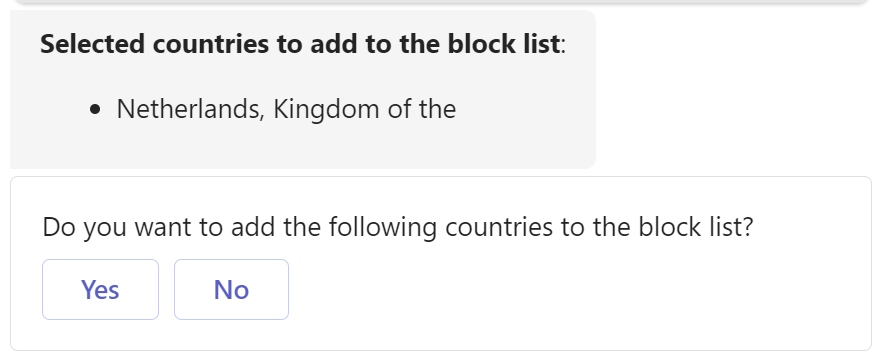
Once you're happy with the countries you can confirm your selection. This'll show a short summary alongside a final confirmation.
Visitors will then see the following message when attempting to start a conversation when they reside in one of the countries that have been blocked.

¶ Remove from the blocklist
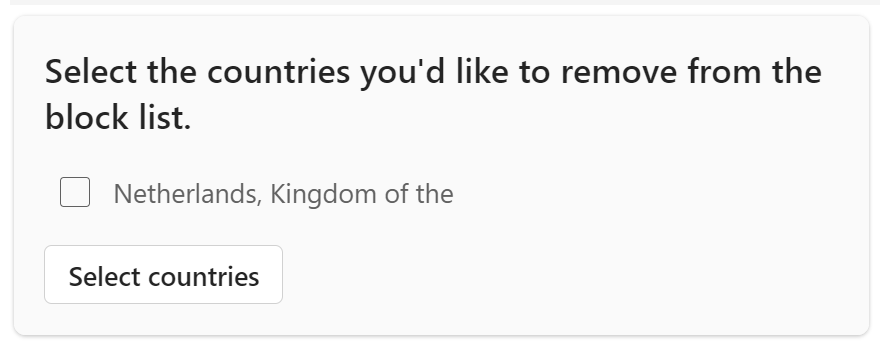
When selecting the option to remove a country from the blocklist, the following dialog will prompt. Here you'll be able to select one or more countries to remove.
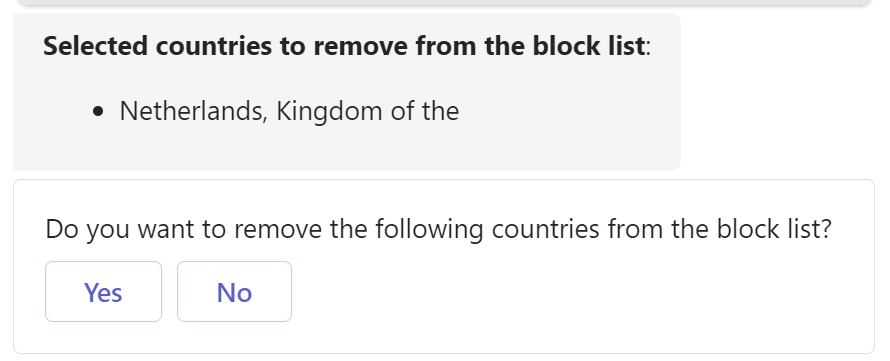
Once you're happy with the selection and have confirmed it, it'll show you a short summary alongside a final confirmation.
¶ Usage and restrictions
Each customer will get 600 x Enterprise Licenses worth of usage which resets on the first day of each month. (For example, if I'm a customer with 5 enterprise licenses I'll get 3000 usage each month.)
This total usage count gets subtracted by 1 each time a visitor attempts to start a conversation when you've registered countries to the blocklist.
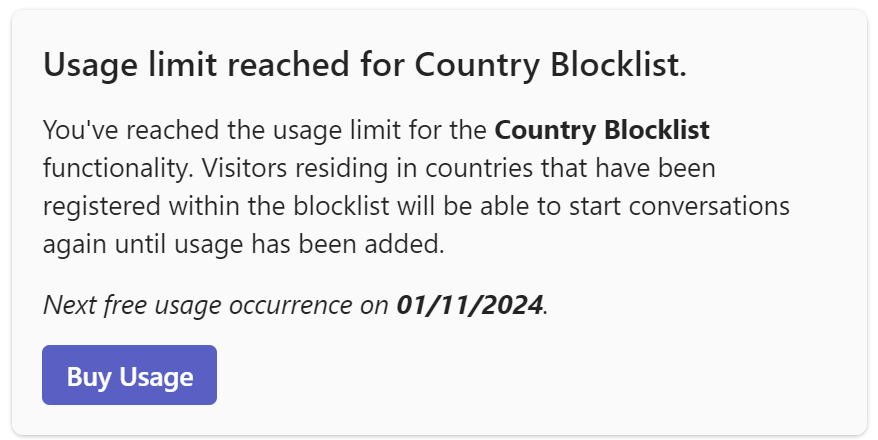
When your usage count reaches 0, the blocklist functionality will cease to function until more usage has been added. This means that all users will be able to start conversations again, regardless of their country of origin.
The following notification will be sent to all registered agents with administrative privileges.
¶ Virtual Assistant
uWebChat offers the functionality to interact with a personalized virtual assistant for customers who possess an Enterprise license. More information on how to initially setup such an assistant can be found here.
The options to manage this feature can be found under Help -> Manage Virtual Assistant -> Edit Virtual Assistant Settings. Or via typing edit virtual assistant settings directly.
There's currently one functionality that can be directly managed for the virtual assistant, aside from regular interaction within chats:
- Save conversation history - This guides you through the process of setting up and managing the saving of transcriptions.
¶ Save conversation history
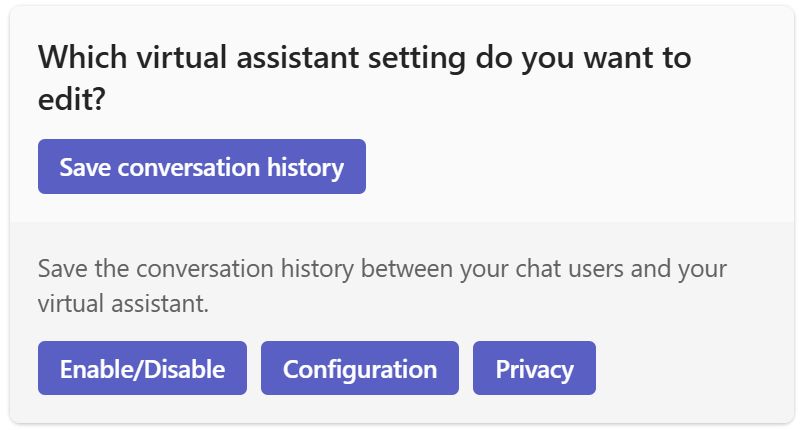
In order to get some insight on how visitors interact with your virtual assistant(s), the functionality to save transcriptions of their respective conversations has been implemented. Upon selecting Save conversation history within the help menu, three additional buttons are exposed for your convenience:
- Enable/Disable - This allows you to globally toggle the saving state of transcriptions per virtual assistant.
- Configuration - This allows you to create or delete configurations (scoped per group) for saving transcriptions.
- Privacy - This allows you to mask/omit private information, like visitor names, from transcriptions.
¶ Save conversation history - Enable/Disable
This setting is responsible for globally managing whether or not the virtual assistant will save any transcriptions. Upon selecting this setting, a rich card will appear, containing a list of your virtual assistants alongside their active transcription state. This can be either Enabled or Disabled.
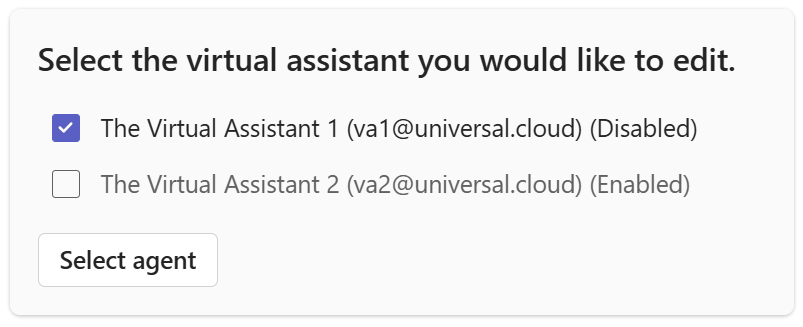
After selecting the relevant virtual assistant, you'll be prompted with a confirmation that their state will be switched.

Note that just enabling virtual assistants to save conversations isn't enough. Once the global state is switched on, you can then setup a configuration within the next chapter.
¶ Save conversation history - Configuration
This setting is responsible for creating new- or deleting existing configurations. Configurations are group specific settings that direct any virtual assistant that resides within them, to start saving their transcriptions. The saving of these transcriptions, and where they are stored, can thus vary on a per group basis.
Create a configuration
Upon selecting the Configuration button, you'll be prompted with the following card. Note that you won't see the option to create or delete configs if this is the first time you're setting one up. Instead you'll be directly prompted with the creation of a new config.
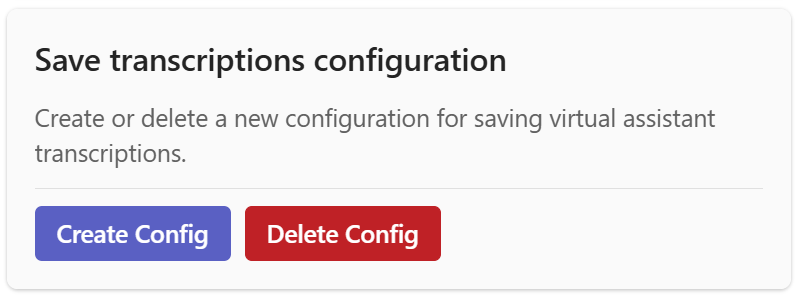
After selecting Create Config the following rich card will present itself. Here you can select which group to create the config for, and the type of storage you'd like to save the transcriptions to.
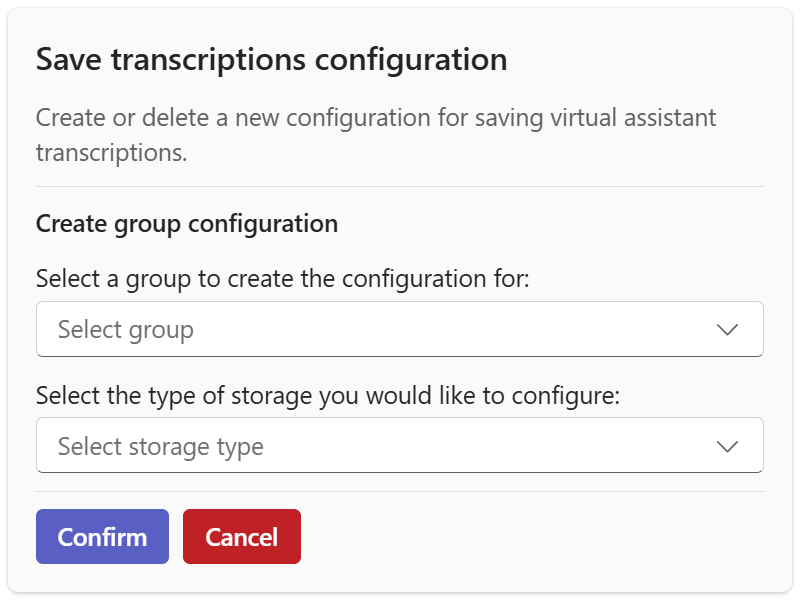
The two types you can currently select for storage are as follows:
- OneDrive (Simple) - Manual transcription saving through the use of an Adaptive Card.
- Azure (Advanced) - Automated transcription saving to your own Azure storage account.
OneDrive (Simple)
When choosing OneDrive, you'll be prompted to select an agent to appoint as owner. This agent will receive an Adaptive Card each time the virtual assistant completes a conversation within this group. They have the option to either view this conversation, or upload it to their personal OneDrive.
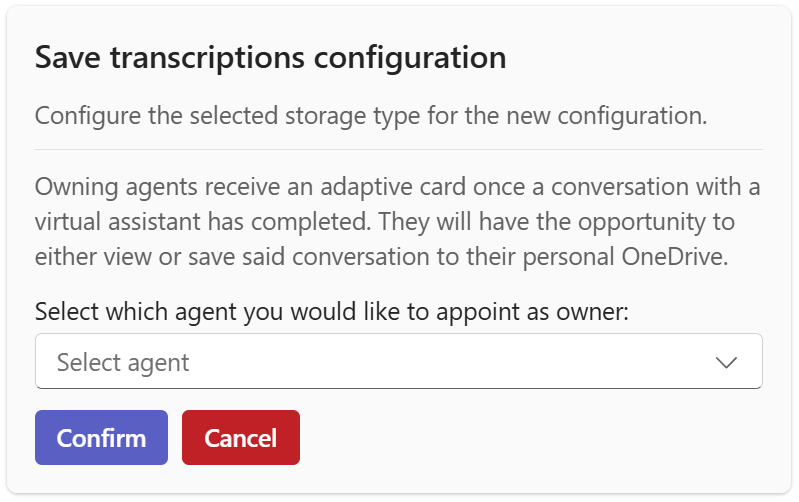
The following screenshot shows one of these Adaptive Cards containing a transcription.

They can then be saved to their personal OneDrive.
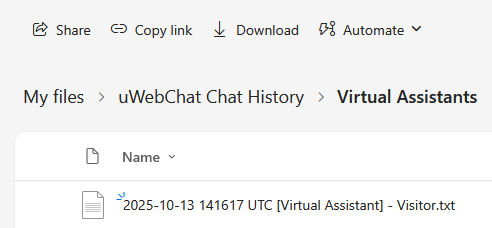
Transcriptions might look something like this:

Azure (Advanced)
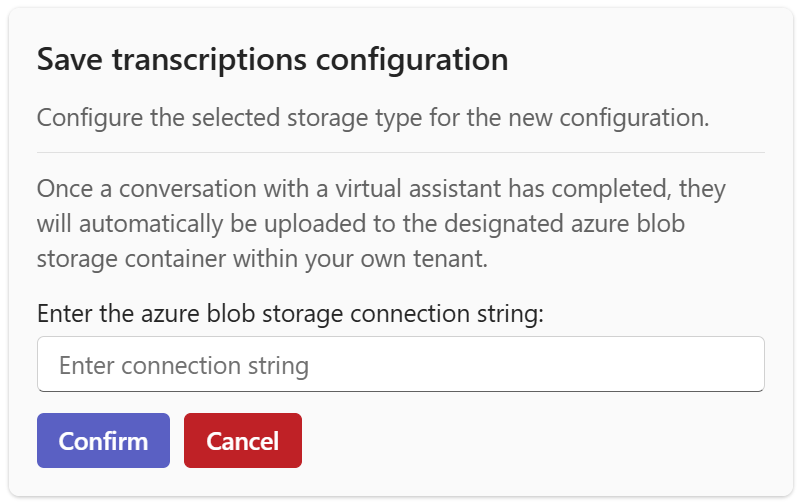
When choosing Azure, you'll be prompted to enter a connection string to your own Azure storage account. The bot will create a custom container called uwebchat-virtual-assistant-conversations. Transcriptions will be automatically uploaded here once the virtual assistant completes a conversation within this group.
Here's an example with how transcriptions will be uploaded to this container.
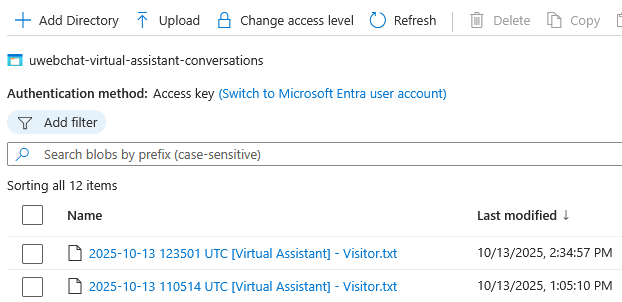
Transcriptions might look something like this:

Delete a configuration
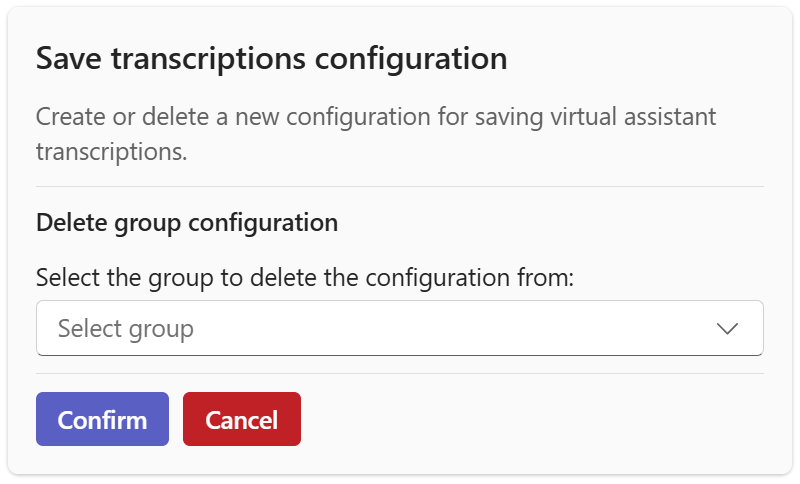
After selecting Delete Config the following rich card will present itself. Here you can select which group to delete the config for. After clicking Confirm the relevant configuration will be removed. Note that you can overwrite existing configurations by creating one over an existing group.
¶ Save conversation history - Privacy
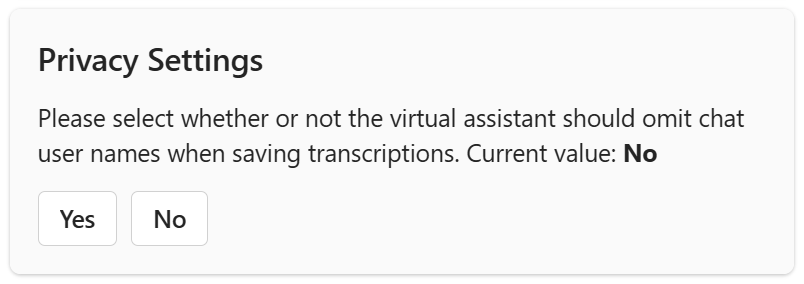
This setting is responsible for managing privacy within the saved transcriptions. When enabled it'll mask user names that visitors use when talking to your virtual assistant, and change them into "Visitor" within the transcriptions. Note that this setting is global, and changes this behavior for all of your virtual assistants.
When selected the following dialog will present itself. Here you can choose either Yes or No to change the behavior to your desired state.
