Managing Groups
A group is a collection of agents which can be hunted in a pre-defined order. When a chat user initiates a group chat, uWebChat will hunt the first available agent in that group (using the pre-defined order).
Managing groups
You can use the following commands to manage groups:
- Show groups - Show all the groups you created (if there are any).
- Add group - Guides you through creating a new group.
- Remove group - Guides you through deleting an existing group.
- Edit group – Guides you through editing group properties you set during the creation of the group.
- Create style – Create a style for the group. For example: in which colour the group is shown. This can later be changed with the command Edit Group.
Group styles
If you own a Professional or Enterprise license, it is possible to change the appearance of a group chat on your website. You can for example change the background colour of the chat window, the text colour of the agent-messages and the text-colour of the chat user’s messages.
The following commands are available for managing styles:
- Show styles – Show a list of all created web chat styles
- Create style – Create your own style
- Edit style – Edit a created style
- Remove style – Remove a created style
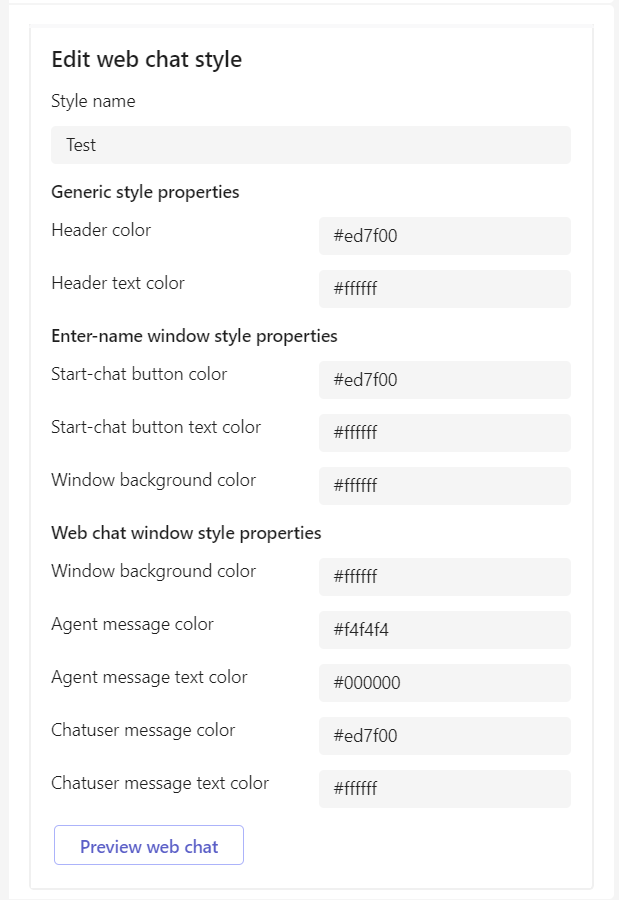 When creating or editing a style, you will see a list with colours which you can change.
Using the Preview web chat button will show you a preview image of your settings. You will be asked if you wish to save your changes. When a style is applied, it will take about 15 minutes before this will be visible in your web chat. When a style is deleted, the default uWebChat style will be applied.
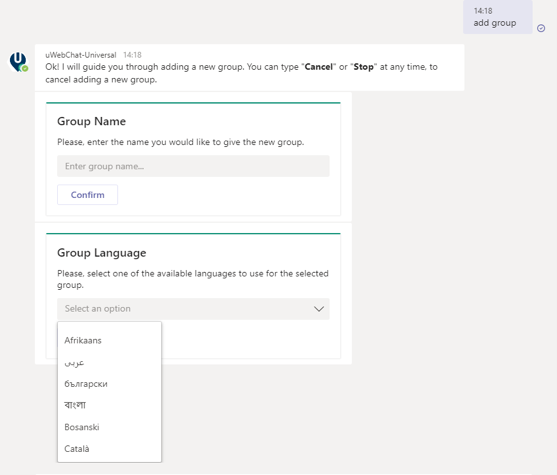
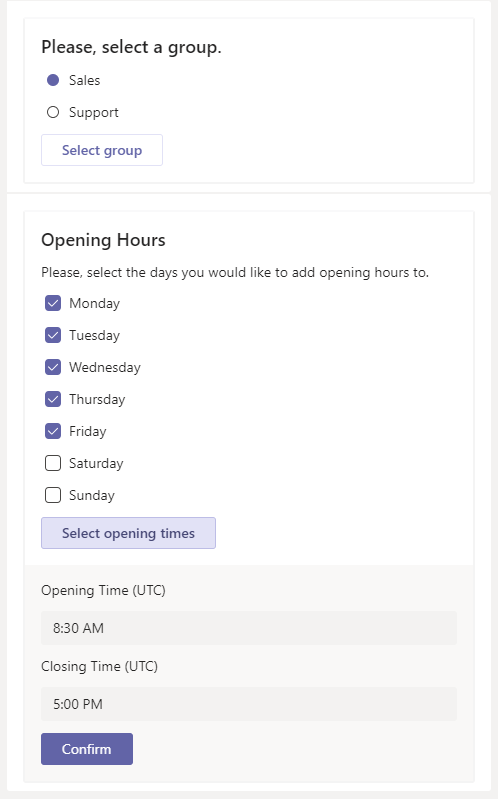
Create group
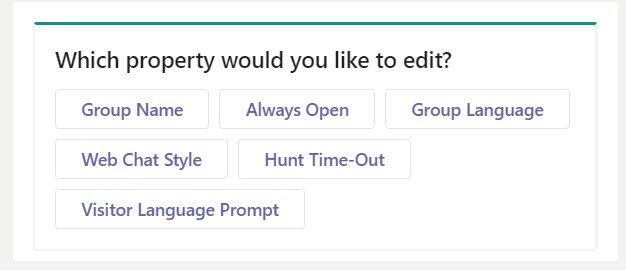
When creating a group with the command Add Group, the first thing that will be asked is to enter a group name. After that, you will be asked if you wish to enable certain features. These can always be changed by using the Edit Group command. This manual will cover these features in detail in other chapters. You will be asked to select:
- Group Language – Set the preferred language of the group.
- Prompt for visitor language – Decide whether website visitors get to choose between the group language or their browser language.
- Prompt for leave a message dialog – Decide if the Leave a Message functionality should be enabled for the group. If there are no available agents or the group is outside business hours, website users can leave a message that can later be picked up by an agent.
- Prompt for what style to use – Able to select a custom group style for the appearance of your chat window.
- Opening Hours or Always Open – Define the availability of the group. Always Open makes your group available, regardless of time. Opening Hours lets you define the hours your group is available.
The language of the group can later be changed with the command Edit Group.
Real Time Translation
The Enterprise edition of uWebChat has access to the real time translation feature. This feature allows agents and chat users to see messages in their preferred language. You can decide what language your group is during the creation of a group or you can use the **Edit Group **command and selecting the Group Language to change this later.
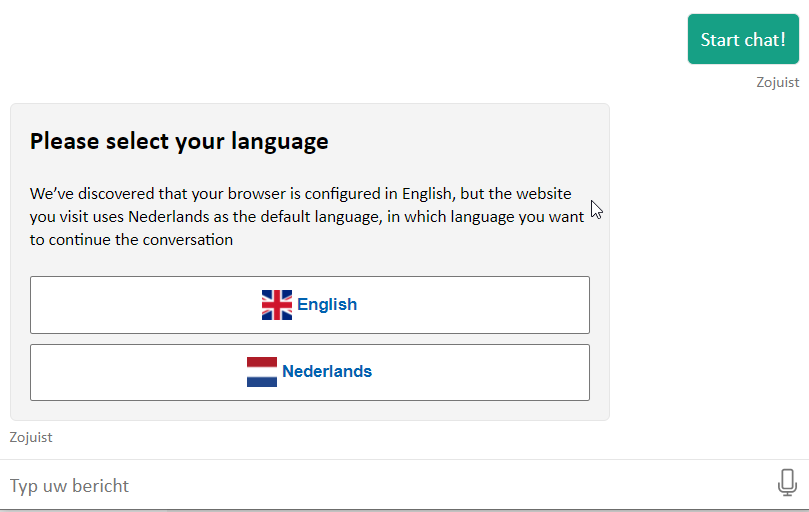
When a chat user has started a group chat, the web chat window will be translated to the chosen language of the group (below: Dutch).
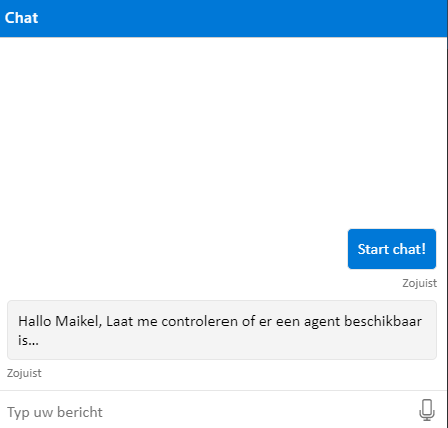
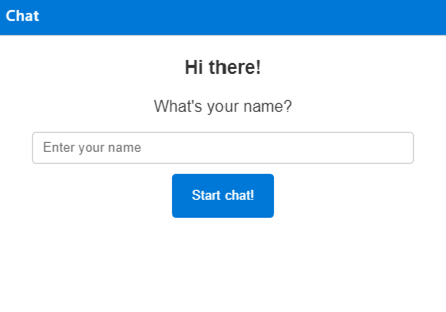
The screen where the chat user must enter his/her name will always be translated to the same language that is set in the chat user’s browser (below: English).
 It is possible that an agent wants to disable real-time translation during a conversation. This might be because your agent is comfortable using multiple languages. During a chat with a website user, the agent can use the /translate command to either enable or disable real-time translation. The website user will not see the command in their chat. Changing this setting during a chat does not translate previously sent messages.
Always Open vs Business Hours
When creating or editing a group, you have a choice to either select Always Open or Business Hours. Always Open makes your group available, regardless of time. Opening Hours lets you define the hours your group is available. See Managing opening hours for more information.
Visitor Language Prompt
When creating or editing a group, you have the choice to select either Yes or No to the Visitor Language Prompt feature. This feature lets website users decide whether they can contact the group in their browser language or use the group language that has been set.
Messages will be translated to the website user’s preferred language.
Leave a Message Prompt
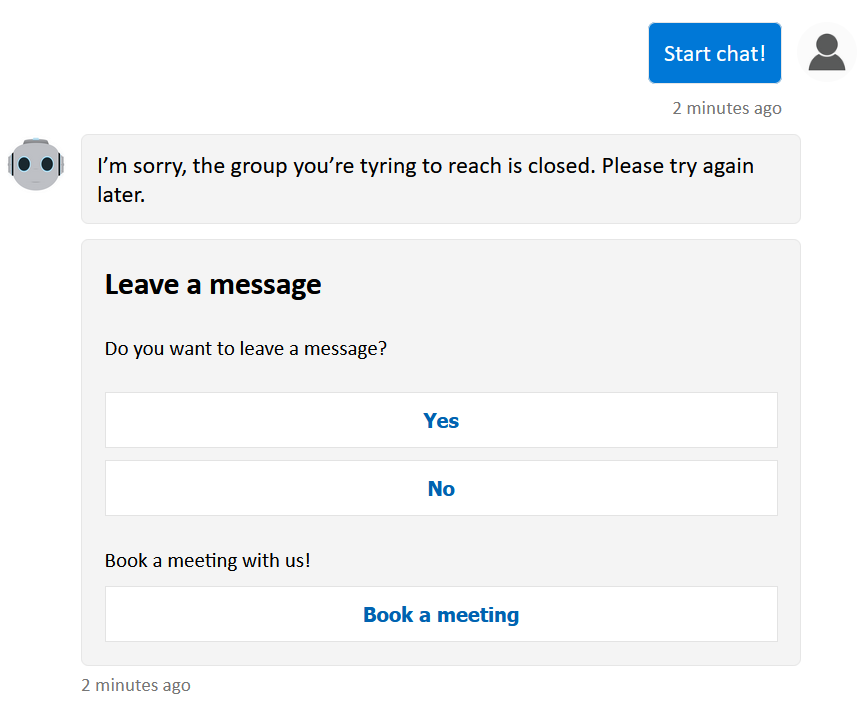
It is possible that a website user wants to chat with an agent, but nobody is available, or the group is outside of Business Hours. You can enable Leave a Message Prompt when creating or editing a group. When this feature is enabled, website users can leave messages to your agents. Agents can acknowledge these messages at their preferred time.
The website user will get the following message.
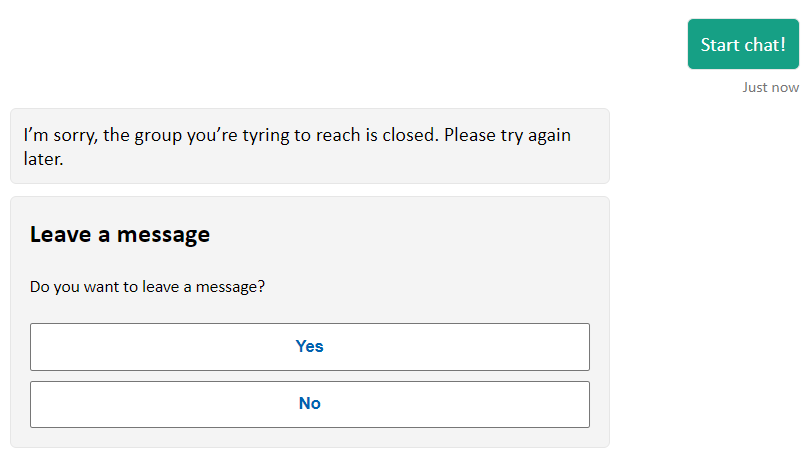
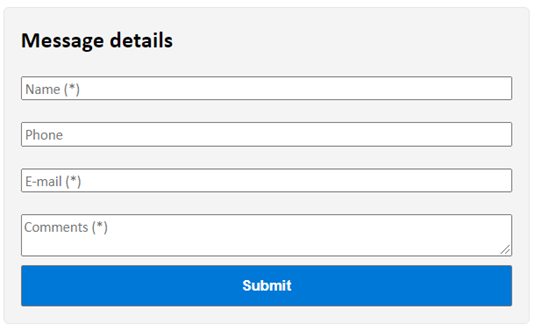
When they select Yes to leave a message, they will receive a form where they can register their details.
After filling in and submitting the form, all agents that are member of the group will receive a message in the form of a rich card.
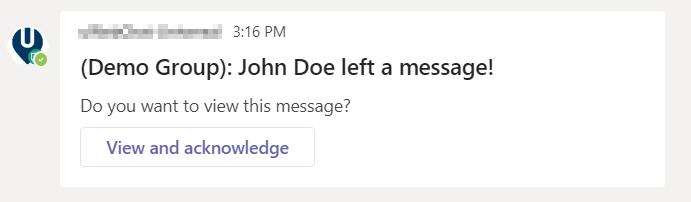
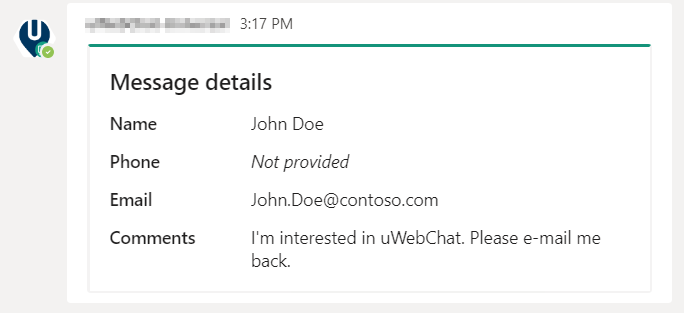
When an agent presses the View and acknowledge button, they will see the message that was left behind.
Once a message has been acknowledged, other agents cannot receive the message anymore. They will get the notification below.

Multiple messages are supported. Agents will receive a unique notification per message.
Leave a Message Custom Button
Leave a Message offers the functionality to add a custom button that redirects to your own URL underneath the prompt.
The custom button has three values that can be set:
- Button title - The title above the button, e.g. Book a meeting with us!.
- Button text - The text inside the button itself, e.g. Book a meeting.
- Button URL - The valid URL that the user will be redirected to, e.g. https://your_domain.com/book-a-meeting-form.
You can use the following commands within the Edit an existing group dialog of the group management section to manage the aforementioned values:
- Leave a Message Button - Opens a collapsible menu that shows the following commands.
- Add custom button - Guides you through the process of adding a new custom button.
- Remove custom button - Guides you through the removal of the existing custom button.
Managing group members
Group members represent agents that are assigned to a specific group.
You can use the following commands to manage group members of a group:
- Show members - Show the members (agents) of a group.
- Add member - Guides you through adding an agent to a group.
- Edit member - Guides you through editing group member properties you set during the creation of the group member.
- Remove member - Remove an agent from a group. Removing an agent from a group does not delete the agent itself.
Group hunting methods
To reach agents for chat conversations, we offer three hunting methods: Default, Round Robin and Simultaneous Hunting.
Default provides hunting based on the Hunt Order Number assigned to agents. A group member with the lowest number (e.g. 1) will be hunted first. If the agent did not accept a chat request within 15 seconds, the request will pass on to a group member with a higher number. If nobody accepted the request within Total Hunt Time-Out time, the hunting stops (these time intervals can be changed using Hunt Time-Out settings).
If you have multiple agents with the same priority, those agents will be hunted based on agent creation date.
Round Robin provides hunting based on the Hunt Order Number assigned to agents. However, it also hunts based on the last agent that has accepted a chat. The last person that has accepted a chat will be excluded from the hunting unless there are no other agents available.
Simultaneous Hunting ignores all Hunt Order Numbers assigned to agents. Instead, it will hunt all agents in a group simultaneously, until one agent accepts the chat.
Managing opening hours
In the free version of uWebChat, all groups will be Always Open. This means that website visitors can hunt the group any time there is an agent available. Starting from the professional version of uWebChat, your groups will be able to have opening hours. By using opening hours, you can define at what times the group should be open and closed. The group can only be hunted while it is open.
You can use the following commands to manage opening hours of a group:
- Show hours – Show all opening hours assigned to a group.
- Add hours – Guides you through adding opening hours to a group.
- Remove hours – Guides you through removing opening hours from a group.
Managing Hunt Time-Out
When a website visitor starts a chat, uWebChat will try to find available agents to accept the chat request. This process is called hunting. You can adjust the duration of the hunting process per group.
Use the Edit Group command and select Hunt Time-Out. From here you will get a rich card with available options.
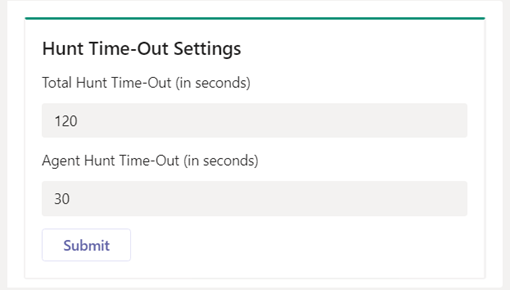
- Total Hunt Time-Out (in seconds) – The maximum amount of time the hunting process can last. After this period has expired, website visitors will receive a message that there are no agents available and if they would like to leave a message (if enabled).
- Agent Hunt Time-Out (in seconds) – The maximum amount of time an agent is hunted before switching to another agent. If you have multiple agents within a group, you can decide how long the hunting process will last per agent. After this period has expired, uWebChat will forward the chat request to the next agent in the group.